Posts

Showing posts from June, 2022

Locking the High-Lift Jack

Image
  I love my high-lift jack. But others do as well, and mounted in the bed of my truck makes an appealing target for thieves. Therefore, I need to lock it up. I looked into the locking knob/handles for the mounting system I purchased, but they're pretty pricey. I needed a cheaper solution, which led me to peruse all the chains and locks I've pack-ratted away in the garage for years.  Long story short, here's what I ended up with. Is it ideal? No, not really. A determined thief could still cut the chain, bolt-cut the lock or hacksaw the tie-down loop in the bed. And I've now got a chain taking up some of the tie-down loop space. Oh, and the chain is going to rattle around in the bed as I drive down the road. But this solution is very inexpensive and should serve my needs. 
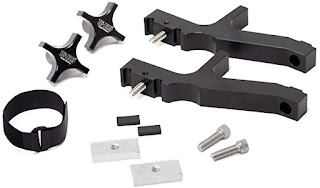
Mounting a High-Lift Jack in the Gladiator

Image
  I've owned a Hi-Lift jack for more than a decade. In all that time, I've only used it a couple of times--but it saved my bacon in each of those situations. Ergo, I insist on carrying this huge jack in my primary off-road vehicle at all times... ...ah, but the Gladiator is not a big vehicle, and my jack is the monster 48" X-Treme version. In the old F250, I easily stored this unit and all its ancillary gear in the toolbox that was mounted in the bed. But the (much) smaller Craftsman box I'm using on the Jeep is far too small to hold the jack. I've distributed the various ancillary jack support gear throughout the under-seat storage areas in the cab and in the toolbox, but the jack itself presented a problem because of its length and weight. This is not something you want to just have banging around in the backseat area of the truck. The solution I ended up with was an (expensive) set of mounting brackets I purchased via Amazon. Yes, I could have fabricated somethi...

Loading Up The Truck: Tools & Recover Gear

Image
  I spent a little time yesterday loading the truck with the various tools and recovery gear that I like to keep in the vehicle. Transitioning from the large F250 down to this mid-sized Gladiator has been a challenge, so the first thing I had to do was pare down my carry-list to the so-called MVP, or minimum viable payload. One of the big goals was to *not* adversely affect the ability to carry passengers in the rear seats. I.e., I want as much tucked away permanently as possible. I don't like carrying bins or tool boxes loose in the truck's cab. Anyway, here's a brief look at where I ended up. First up is the big Craftsman saddle toolbox (which, btw, already has a glitch with the driver's side lock that I have to fix. argh): A view into the toolbox from the passenger side. In the foreground on the right is my red tool bag with a set of standard hand tools, such as hammers, screwdrivers, pliers, etc.  Below it (not visible) is a large SAE and metric socket set and wrenc...

Mods 2 and 3: Spray-in Bedliner and Toolbox

Image
  Well, the next two modifications are complete. The first of these was a spray-in bedliner. I originally wanted to order the truck with the factory bedliner applied, but the dealership told me it could add 1-2 months to the order time. Plus the cost of the factory liner was pretty pricey. Ergo, I ordered the truck without a bed liner and instead found a local company ("The Option") to perform an aftermarket installation. The liner is the brand name of "bullet liner." I'm really impressed with both the review of this liner and how well guys at The Option did installing. Very clean, professional job (the dirt footprints in the photos are mine): The second thing I did was install a tool box. I looked at a lot of options, including Decked (pricey and a bed killer), Diamondback (very pricier and not quite what I need), and various saddle boxes. On my previous trucks, I've always used a saddle box, so this is the route I went. The big problem, however, is the stu...

The First (Small) Modification: A Rubber Antenna

Image
 Well, I've made the first of several planned modifications to the Gladiator.  And it's a big one! Okay, maybe not big. But it does mark the first step in a journey to turn the Jeep into a vehicle that suits my needs and requirements. This first mod was the replacement of the factory OEM metallic radio antenna with a shorter, flexible rubber one. Specifically, I went with a 13-inch Rydonair Antenna that I purchased off Amazon. It has excellent reviews and is very similar to ones I've swapped out on previous vehicles I've owned. So why did I change this out? Experience has shown that the rigid steel antennas will break or bend when used off-road. When they catch on over-hanging branches, they'll snap. I've had this happen to me in the past, and on our standard route up to our cabin we encounter lots of trees that crowd the trail. So how was the installation? Answer: super easy. Honestly, the hardest part was removing the old steel antenna. I could loosen it easil...